Ford CVH engine reassembly - is a part of Ford repair manuals: Ford CVH Engines. This part contains the detailed description and diagrams for Ford CVH engine reassembly:
- with everything clean and parts renewed where necessary, commence reassembly by inserting the ventilation baffle into the crankcase; make sure that the spring arms engage securely;
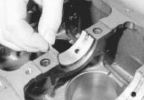
- insert the bearing half shells into their seats in the crankcase, making sure that the seats are perfectly clean;
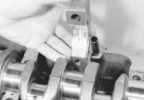
- stick the semi-circular thrustwashers on either side of the centre bearing with thick grease; make sure that the oil channels face outwards;
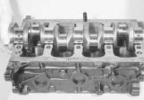
- oil the bearing shells and carefully lower the crankshaft into position;
 |
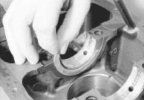 |  |  |
- insert the bearing shells into the main bearing caps, making sure that their seats are perfectly clean;
- oil the bearings and install the caps to their correct numbered location and with the directional arrow pointing towards the timing belt end of the engine;
- tighten the main bearing cap bolts to the specified torque;
- check the crankshaft endfloat; ideally a dial gauge should be used, but feeler blades are an alternative if inserted between the face of the thrustwasher and the machined surface of the crankshaft balance web, having first prised the crankshaft in one direction and then the other;
- provided the thrustwashers at the centre bearing have been renewed, the endfloat should be within specified tolerance; if it is not, oversize thrustwashers are available;
- the pistons / connecting rods should now be installed;
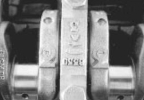
- although new pistons will have been fitted to the rods by your dealer or supplier with the piston crown arrow or cast nipple in the piston oil cut-out pointing towards the timing belt end of the engine, the F mark on the connecting rod or the oil ejection hole in the rod big-end is as shown;
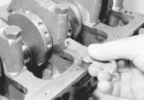
- oil the cylinder bores and install the pistons/connecting rods;
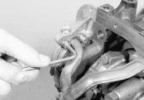
- fit the oil pressure switch and tighten;
 |
 | 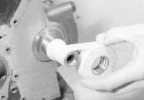 |  |
- before fitting the oil pump, action must be taken to prevent damage to the pump oil seal from the step on the front end of the crankshaft;
- first remove the Woodruff key and using adhesive tape to form a smooth inclined surface to permit the pump seal to slide over the step without turning back its lip or displacing the seal spring during installation;
- if the oil pump is new, pour some oil into it before installation in order to prime it and rotate its driving gear a few turns;
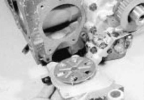
- align the pump gear flats with those on the crankshaft and install the oil pump, complete with new gasket;
- tighten the bolts to the specified torque;
- remove the adhesive tape and tap the Woodruff key into its groove;
- bolt the oil pump pick-up tube into position;
- to the front end of the crankshaft, fit the dished thrustwasher (belt guide) so that its concave side is towards the pump;
- fit the crankshaft belt sprocket. If it is tight, draw it into position using the pulley bolt and a distance piece;
- make sure that the belt retaining flange of the sprocket is towards the front of the crankshaft and the nose of the shaft has been smeared with a little grease before fitting;
- install the coolant pump using a new gasket and tightening the bolts to the specified torque;
- fit the timing belt tensioner and its coil spring (where fitted);
- lever the tensioner fully against the spring pressure and temporarily tighten the bolts;
- using a new gasket, bolt on the rear oil seal retainer, which will have been fitted with a new oil seal and the seal lips greased;
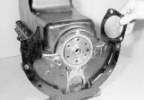
- engage the engine adapter plate on its locating dowels and then offer up the flywheel;
- it will only go on in one position as it has offset holes;
 |
 |  |  |
- insert new bolts and tighten to the specified torque; the bolts are pre-coated with thread sealant;
- fit the clutch and centralise it;
- fit the sump and the cylinder head;
- refit the manifolds;
- install and tension the timing belt;
- using a new gasket, fit the rocker cover;
- tighten the cover retaining bolts to the specified torque;
- reconnect the crankcase ventilation hoses between the rocker cover and the crankcase;
- screw in a new set of spark plugs, correctly gapped, and tighten to the specified torque - this is important; if the specified torque is exceeded, the plugs may be impossible to remove;
- fit the timing belt cover;
- fit the crankshaft pulley (if not done already) and tighten the bolt to the specified torque while the flywheel ring gear is locked to prevent it from turning;
- smear the sealing ring of a new oil filter with a little grease, and screw it into position using hand pressure only;
- install the engine mounting brackets, if removed;
- refit the ancillaries; the alternator bracket and alternator, the fuel pump, the thermostat housing and the distributor;
- fit the distributor cap and reconnect the HT leads;
- check the tightness of the oil drain plug and insert the dipstick.
from Ford repair manuals
