Ford carburettor Weber 2V TLD automatic choke unit removal, refitting and adjustment - is a part of Ford repair manuals: Fuel and exhaust syatems. This part contains the detailed description of automatic choke unit removal, refitting and adjustment works and all necessary diagrams for Ford carburettor Weber 2V TLD.
Ford carburettor Weber 2V TLD automatic choke unit removal, refitting and adjustment:
- remove the carburettor top cover;
- note the position of the alignment marks on the choke housing and bi-metal housing and, if necessary, make additional alignment marks to aid refitting;
- remove the three screws and lift off the bi-metal housing and retaining plate;
- remove the internal heat shield;
- remove the three choke housing screws, noting that it may be necessary to disconnect the fast idle cam return spring to access one of the screws, then disconnect the choke link from the operating lever and remove the automatic choke unit;
- recover the O-ring from the rear of the unit;
- undo the three retaining screws then remove the vacuum pulldown diaphragm cover and withdraw the diaphragm;
- examine the diaphragm for signs of splits or holes and renew if necessary;
- if necessary, dismantle the automatic choke unit;

Exploded view of Ford carburettor Weber 2V TLD automatic choke mechanism: A - upper choke operating link; B - fast idle cam return spring; C - spindle sleeve; D - connecting rod and lever assembly; E - pulldown link; F - actuating lever.
- refitting is a reverse of the removal procedure noting the following points: ensure that the pull-down diaphragm is correctly seated prior to refitting the cover; ensure that the O-ring is correctly seated in the choke housing prior to refitting; with the choke housing installed check and, if necessary, adjust the vacuum pull-down diaphragm; refit the heat shield ensuring that the hole in the shield engages with choke housing peg; engage the bi-metal spring with the choke lever and refit the bi-metal housing. Align the marks made, or noted, on removal and securely tighten the housing retaining screws; on completion check and, if necessary, adjust the fast idle speed;
Ford carburettor Weber 2V TLD fast idle speed adjustment:
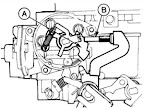
 A - fast idle cam;
B - fast idle screw shown on middle step of cam.
- check the idle speed and mixture adjustment as described earlier in this part and leave the tachometer connected;
- note that the idle speed must be correct before attempting to check or adjust the fast idle speed;
- warm the engine up to normal operating temperature and remove the air cleaner;
- partially open the throttle valve then close the choke valve until the fast idle adjustment screw is positioned on the third (middle) step of the fast idle cam and release the throttle valve;
- start the engine without touching the throttle pedal and check that the engine speed is within the speed range given in the specifications at the start of this chapter;
- if this is not the case, adjust the engine speed by rotating the fast idle adjusting screw until the speed is within the specified range;
- operate the throttle pedal and check that the engine returns to the specified idle speed;
- stop the engine then disconnect the tachometer and refit the air cleaner.
Read more: Ford carburettor diagrams
from Ford repair manuals
